DxO PureRAW 4: Now With A Full Sized Preview

DxO have just released the latest version of their PureRAW software.
Compared to PureRAW 3, the new version is faster, image quality is very slightly better and it comes with some new features that will help photographers tweak each image to get the best settings combinations.
I use PureRAW on almost all of my images before processing them with Lightroom. I’ve had the new version for about a week and I’ll definitely be upgrading my copy.
Read on to see what’s new and see the speed and quality differences.
What Is DxO PureRAW 4?
For those that don’t know - PureRAW 4 is a raw pre-processor. It takes the raw files from your camera and runs them through DxO’s class leading Noise Reduction, Sharpening and Optical Correction algorithms and spits out a .dng file ready for processing in your favourite raw converter.
(Yes, it can also output a .tiff or .jpeg file with the corrections applied as well - but the power of this software is really using it as a raw pre-processing engine)
In order for you to get the most from the optical corrections, your camera and lens will need to be on the (huge) list of supported equipment (DxO supported list). The class leading noise reduction will work with almost any camera raw format.
If you don’t shoot in raw format then you can skip this software altogether
Some new text
What’s New In DxO PureRAW 4?
Why not try out the PureRAW 4 software on your own images? You can download a 30 day free trial
Try PureRAW for freeDeepPRIME XD2
The headline new feature is an update to the DeNoise and Demosaicing algorithms that help generate sharp, noise free images with accurate colour.
DxO really pioneered the use of complex algorithms to achieve world class denoise software and with the relatively recent advances in machine learning and neural networks, they have continued to push the boundaries of what is possible.
I’ll test a couple of images later in the article for you to compare.
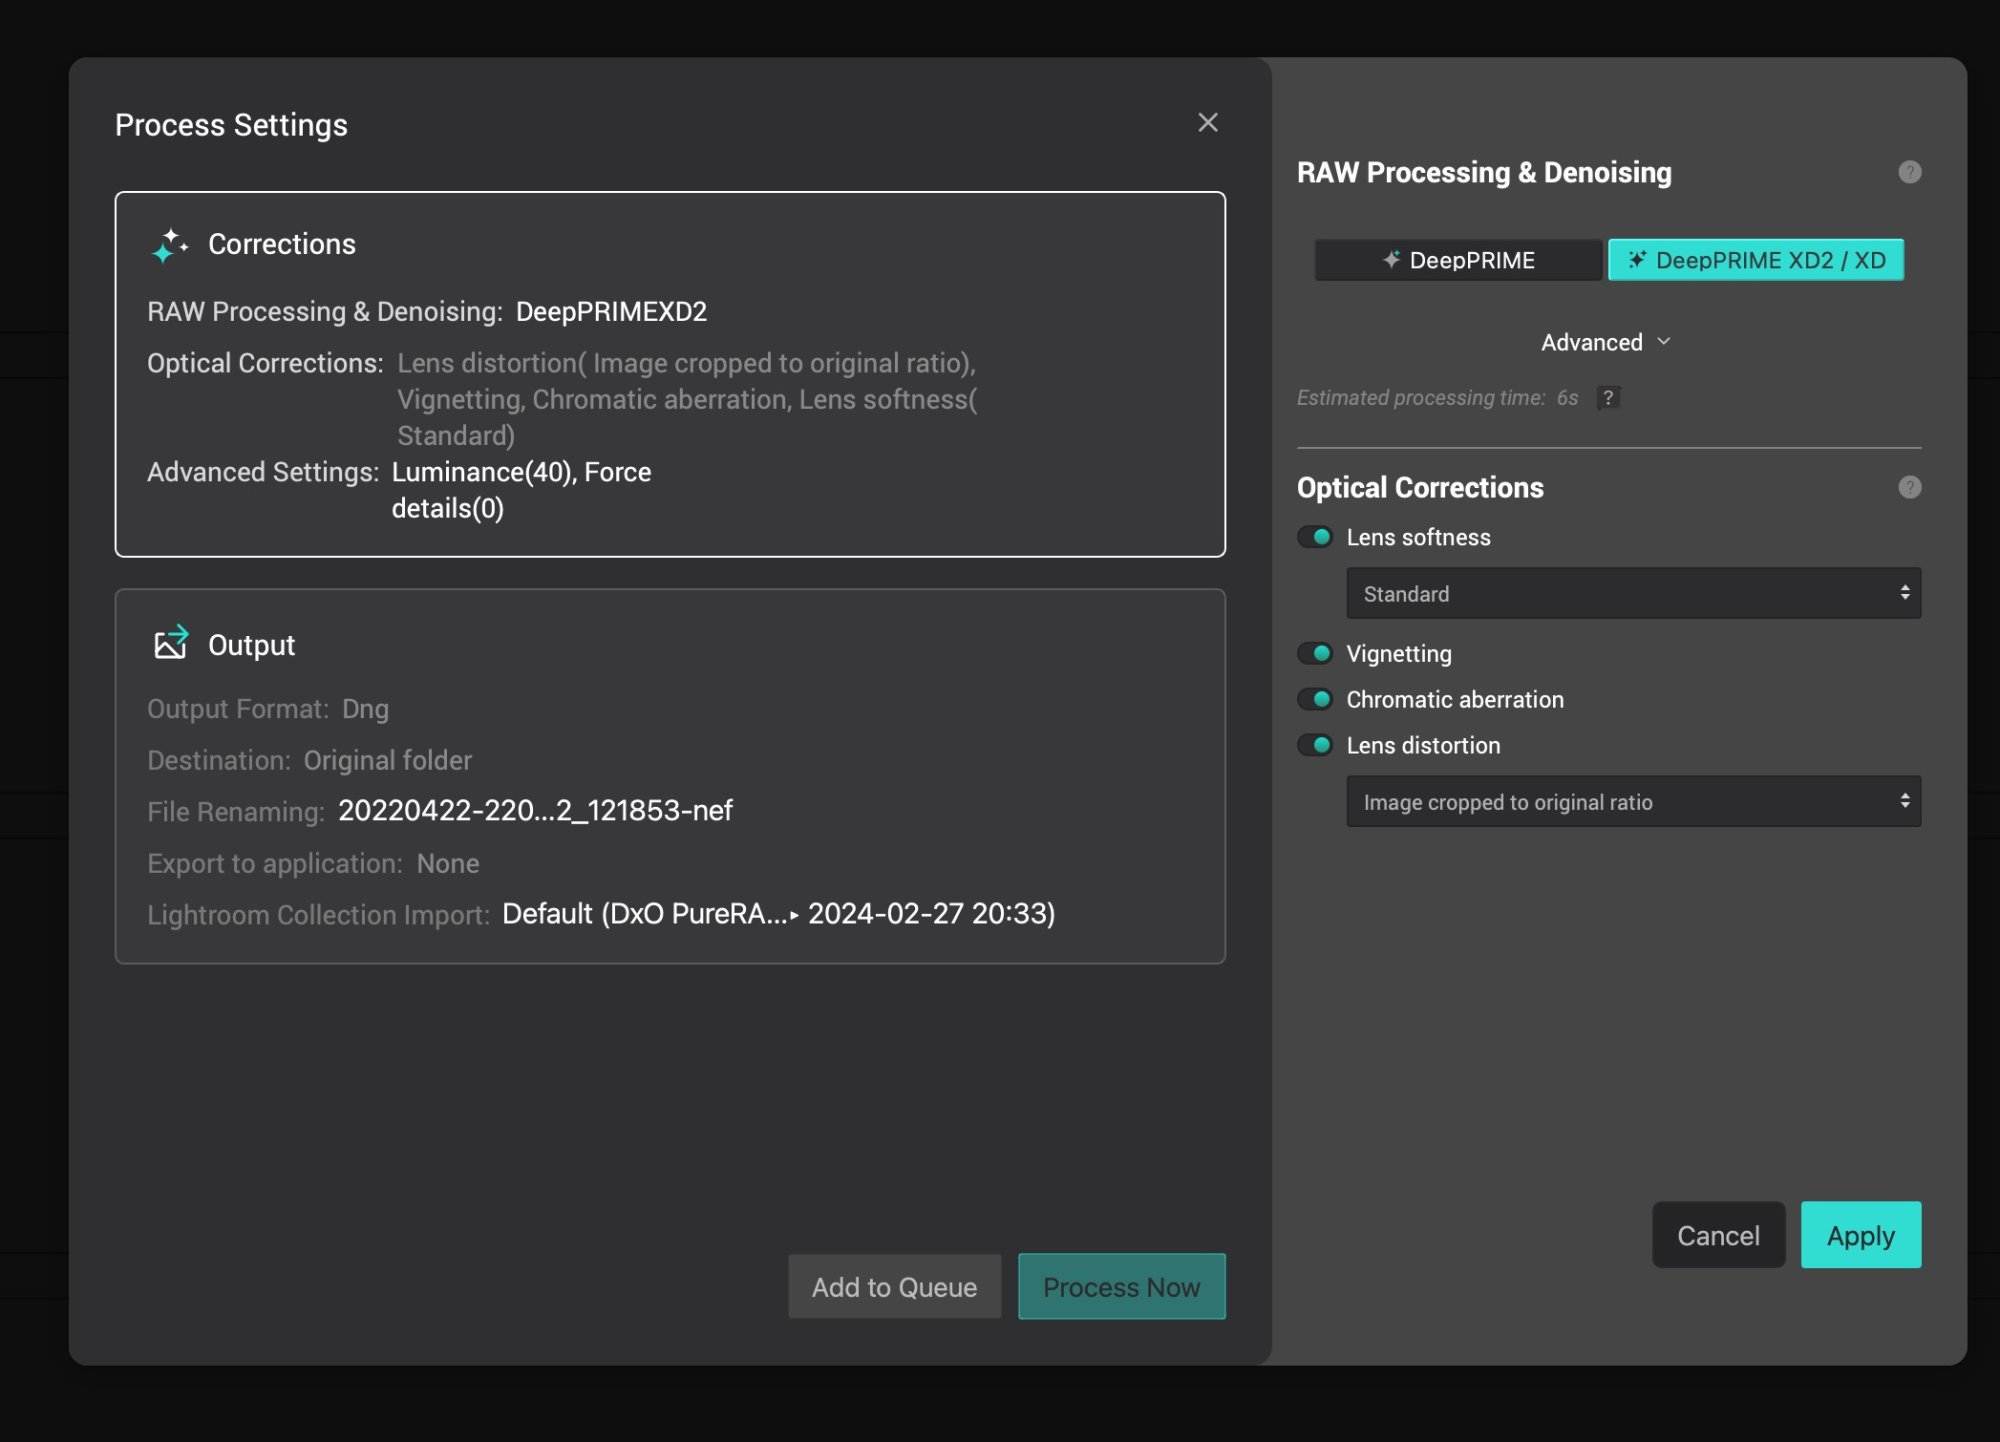
With this update also comes the addition of two advanced controls. You can now adjust the amount of luminance noise reduction that is applied to an image, and also force the algorithm to keep detail in the resulting output

Updated Lens Sharpness
In addition to the updated DeepPRIME XD2 algorithm, DxO have also updated their lens softness modules to give a boost to image sharpness towards the edge of the frame (where lenses often get soft) where needed.
If you’re not aware, the Lens Softness feature isn’t designed to fix an image that was mis-focused or is blurry due to motion blur… but it uses information from DxO’s extensive camera/lens lab testing to help make the most from the equipment you have and counteract softness introduced by flawed lens optics.
You might find the following articles interesting
Real-Time Image Previews
To me, probably the most exciting part of this update is that there is now a real-time preview window that allows you to see how your chosen settings will affect the image.

Previously you could only see the output of your settings after you had processed your image(s). This was due to the fact it would have taken a large amount of time to update your image with every tiny adjustment of a setting.
With advances in algorithm speed and processing power, it is now possible to see what you’re going to get as you make adjustments.
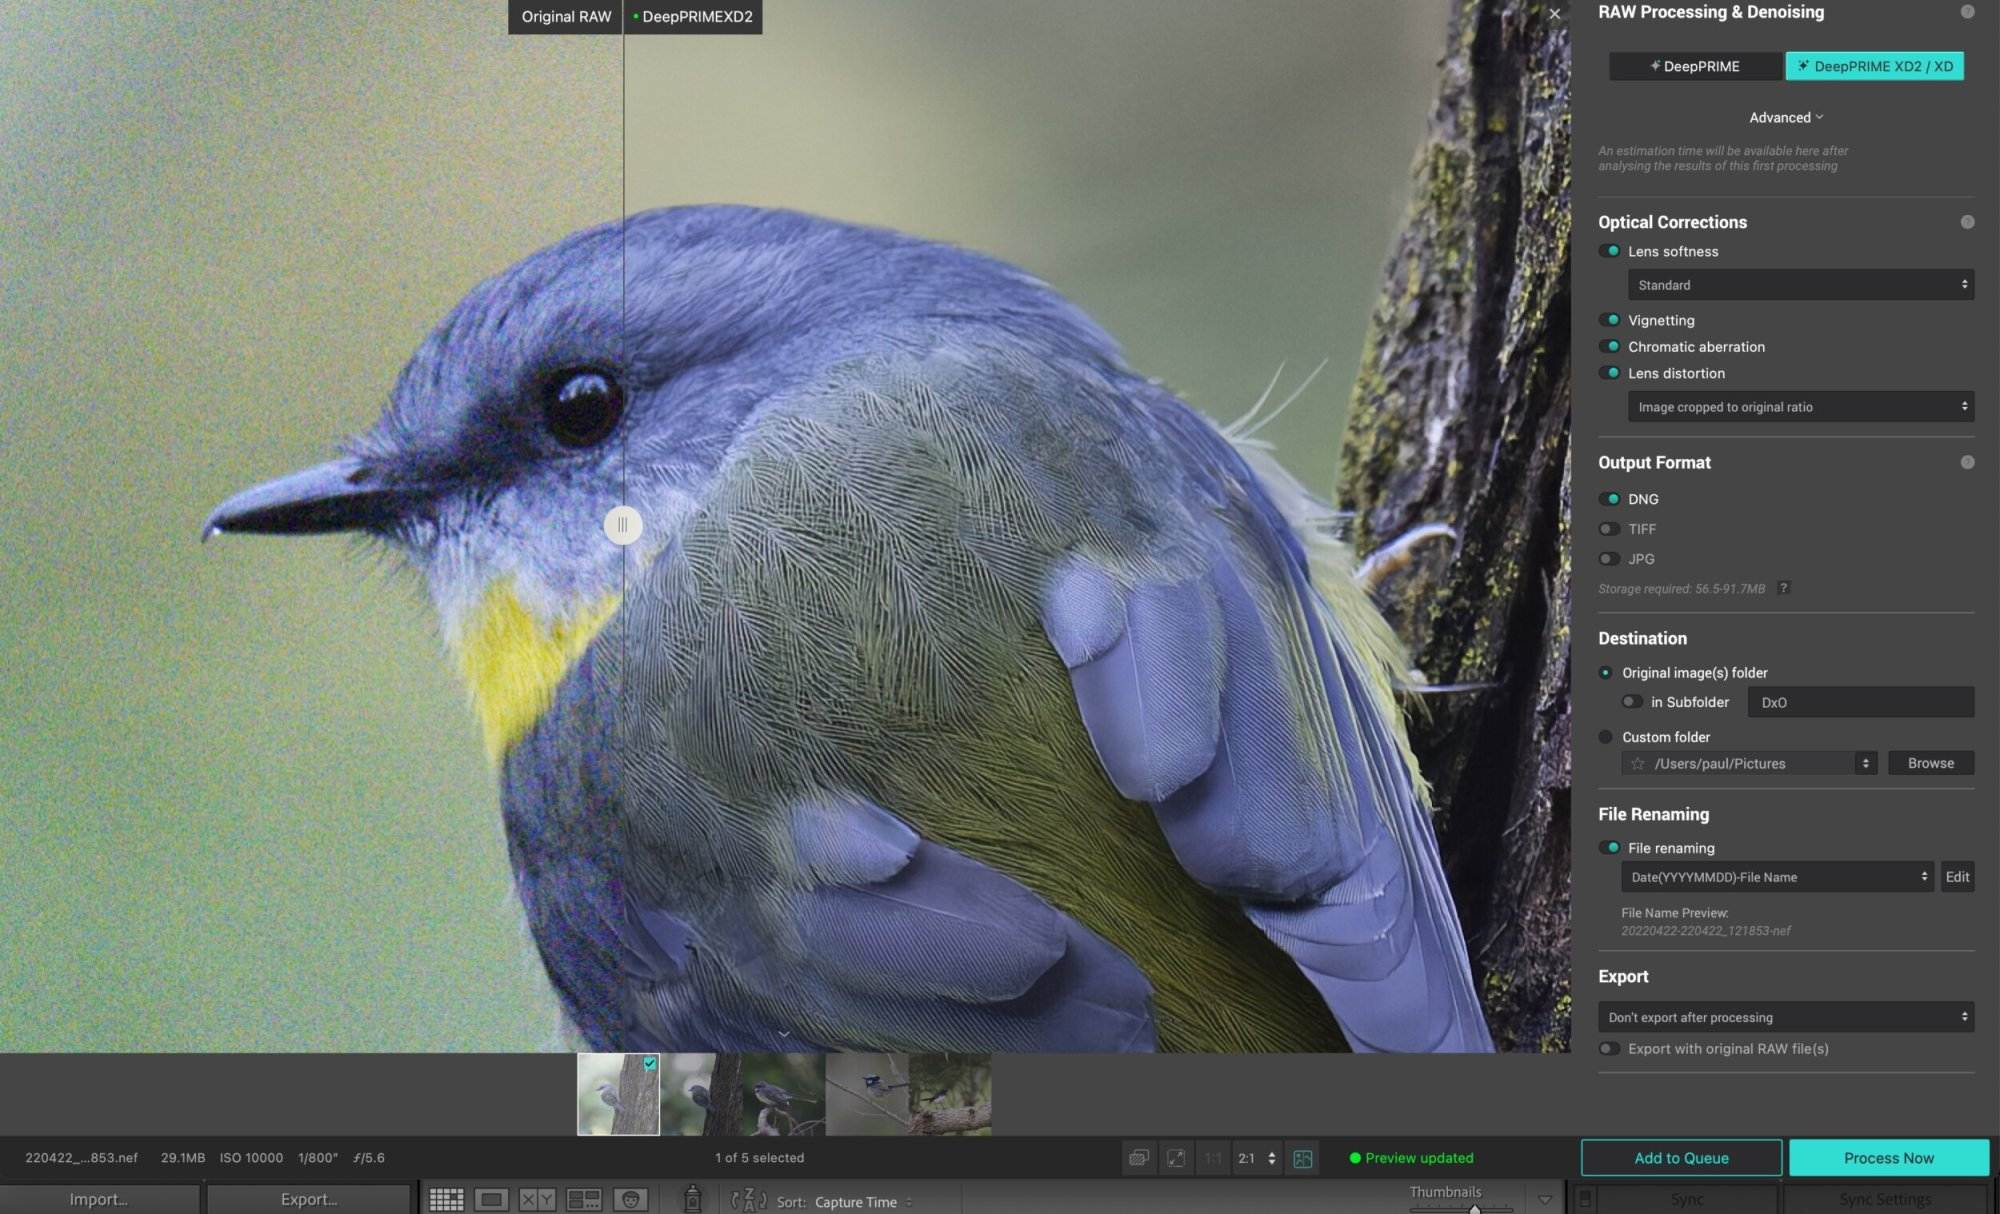
A real timesaver that will help prevent having to re-process images if your settings didn’t give the output you were expecting.
Of course, if you use the same settings each time, or are confident you won’t need the preview, you can choose not to use it.
PureRAW 4 Testing Results
The bit that most people are probably reading this article for… how does it compare to older versions?
The following tests were done on my MacBook Pro with M3 Max with 14 core cpu, 30 core gpu, 16 core neural engine, 36 GB RAM. PureRAW4 has been set to use the neural engine by default as it is the fastest processing engine for this stuff.
Speed
Yep, it’s faster
I took 10 images from my Nikon D500 and 10 images from my Nikon Z7II and ran them through both PureRAW 3 and PureRAW 4 with the same settings.
Why not try out the PureRAW 4 software on your own images? You can download a 30 day free trial
Try PureRAW for free- DeepPRIME XD (PureRAW 3) / DeepPRIME XD2 (PureRAW 4)
- Standard Lens Softness
- Vignetting, Chromatic Aberration, Lens distortion all on
- Output - DNG
| Camera | PureRAW 3 10 Photos | PureRAW 4 10 Photos | PureRAW 3 1 Photo | PureRAW 4 1 Photo | Difference |
|---|---|---|---|---|---|
| Nikon D500 (21 MPix) | 77s | 58s | 7.7s | 5.8s | 25% Faster |
| Nikon Z7II (45 MPix) | 163s | 122s | 16.3s | 12.2s | 25% Faster |
I ran this test with a couple of different batches of images and the results were very similar each time.
On my hardware, PureRAW 4 is about 25% quicker than PureRAW 3
Image Quality
Speed savings are always welcome - but only if the image quality is at least as good. Let’s take a (non-scientific) look at how the two compares.
For these examples I first processed the image in PureRAW versions 3 and 4 with the same settings, tweaking the new ‘advanced’ settings in PureRAW 4 to get the best results - then finished the images off in Lightroom with the same processing settings for each image. I did have to lower the sharpness in Lightroom for the PureRAW 4 image due to it being sharper straight from PureRAW.
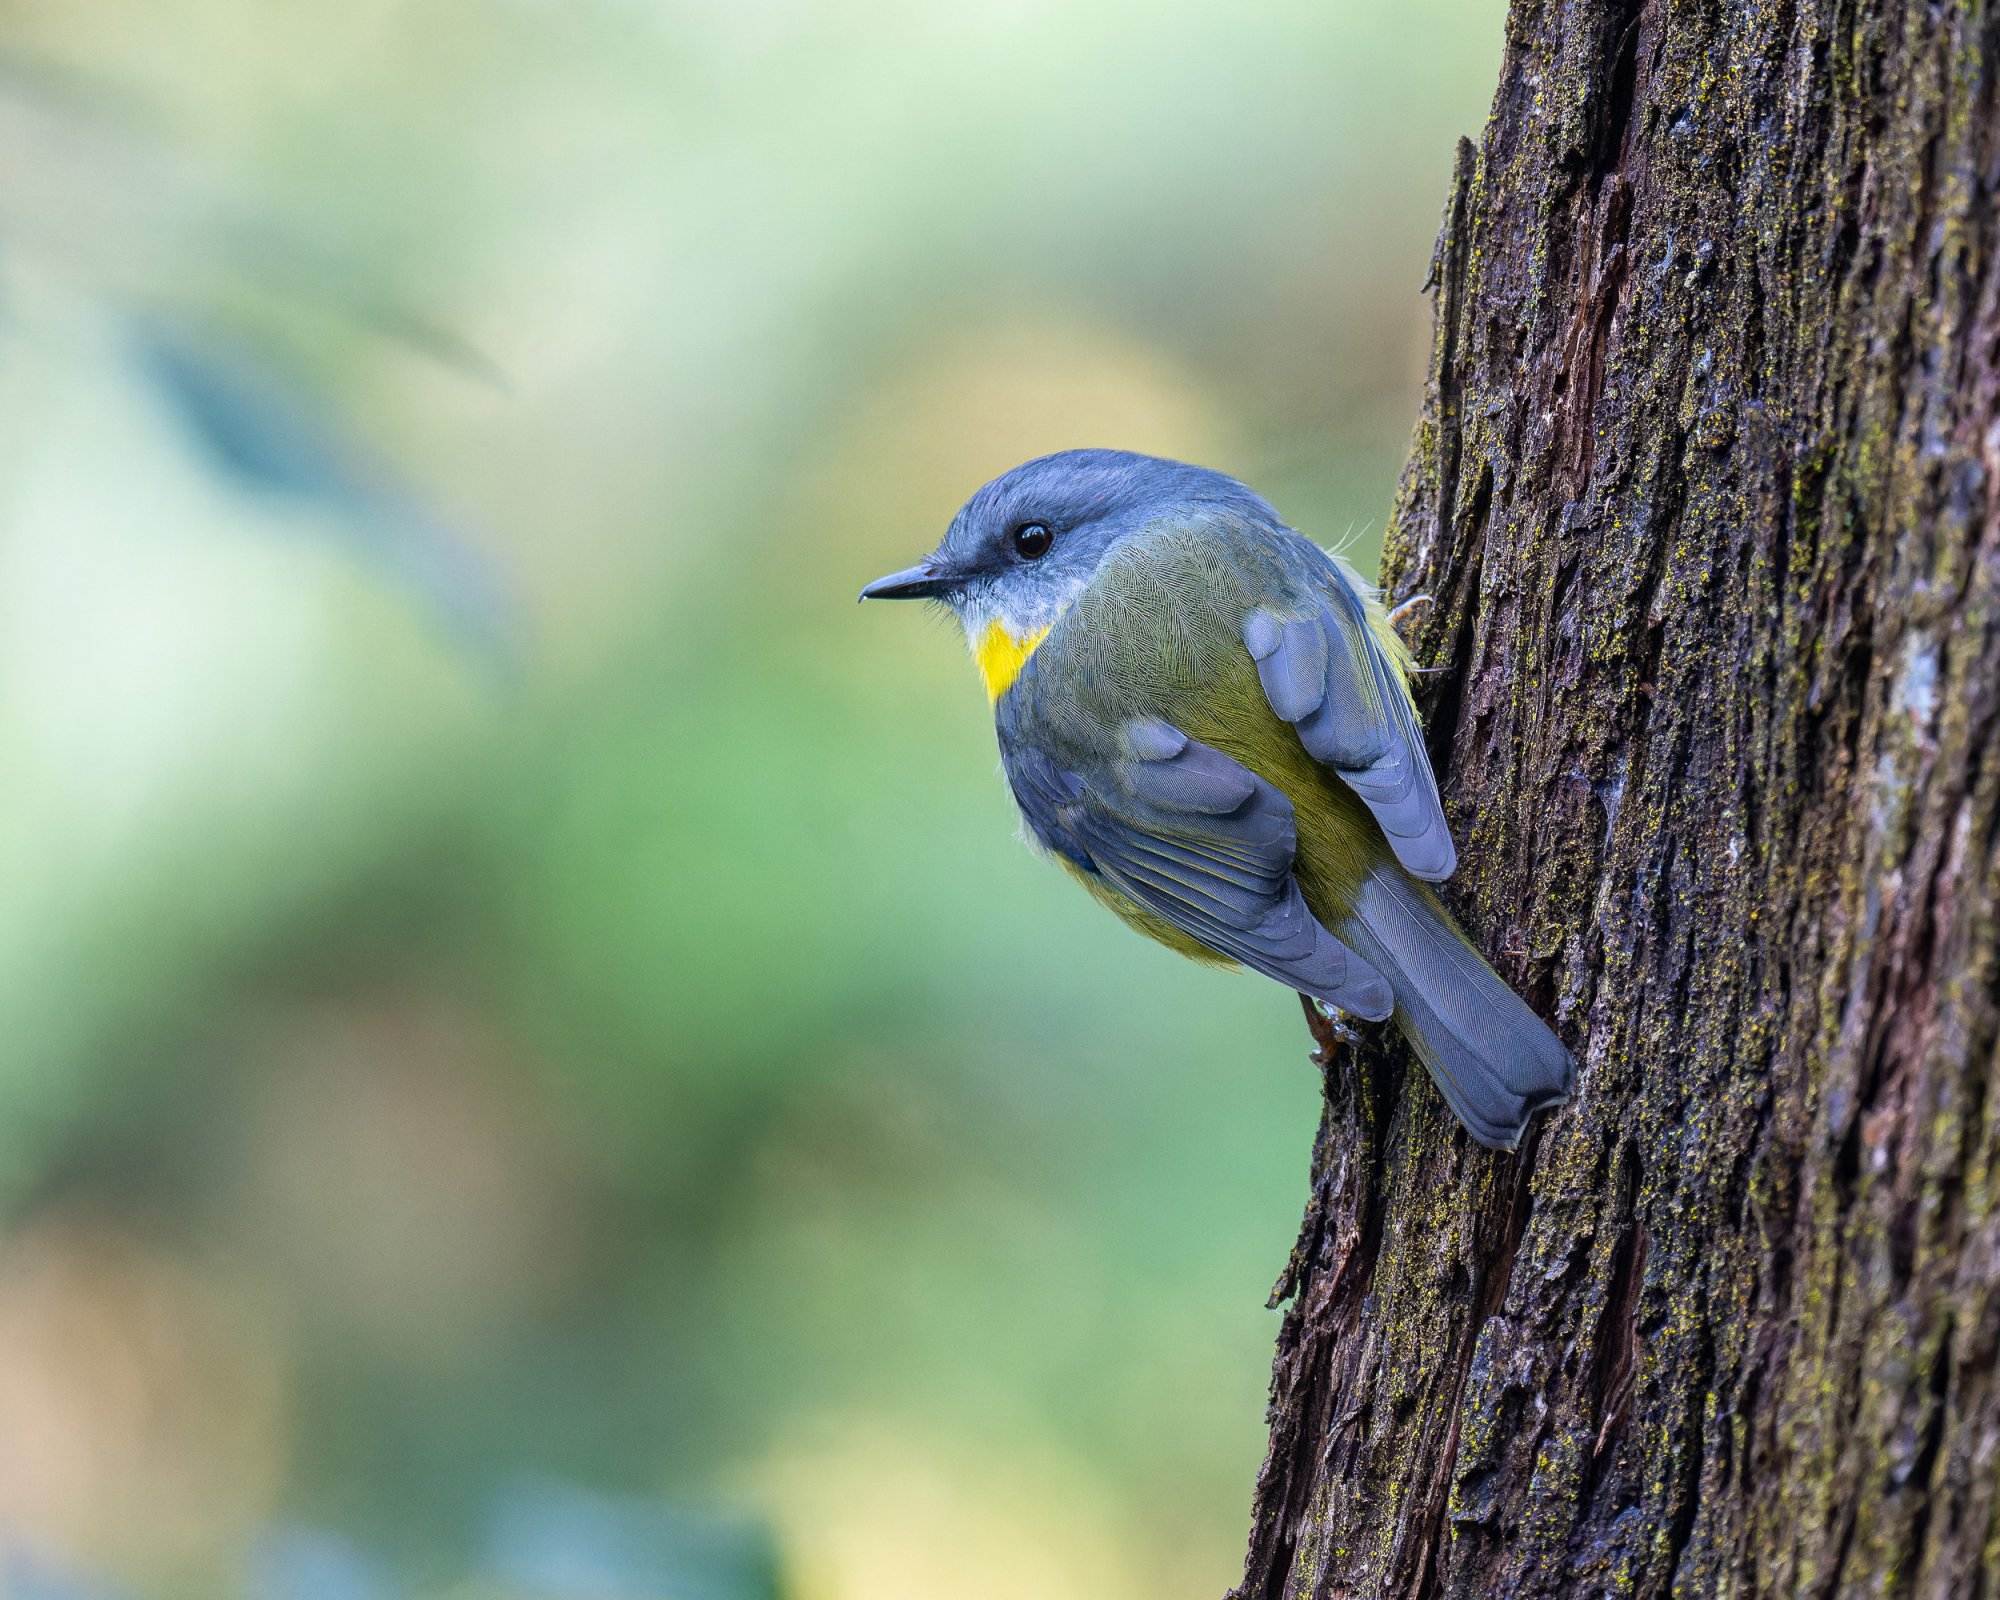
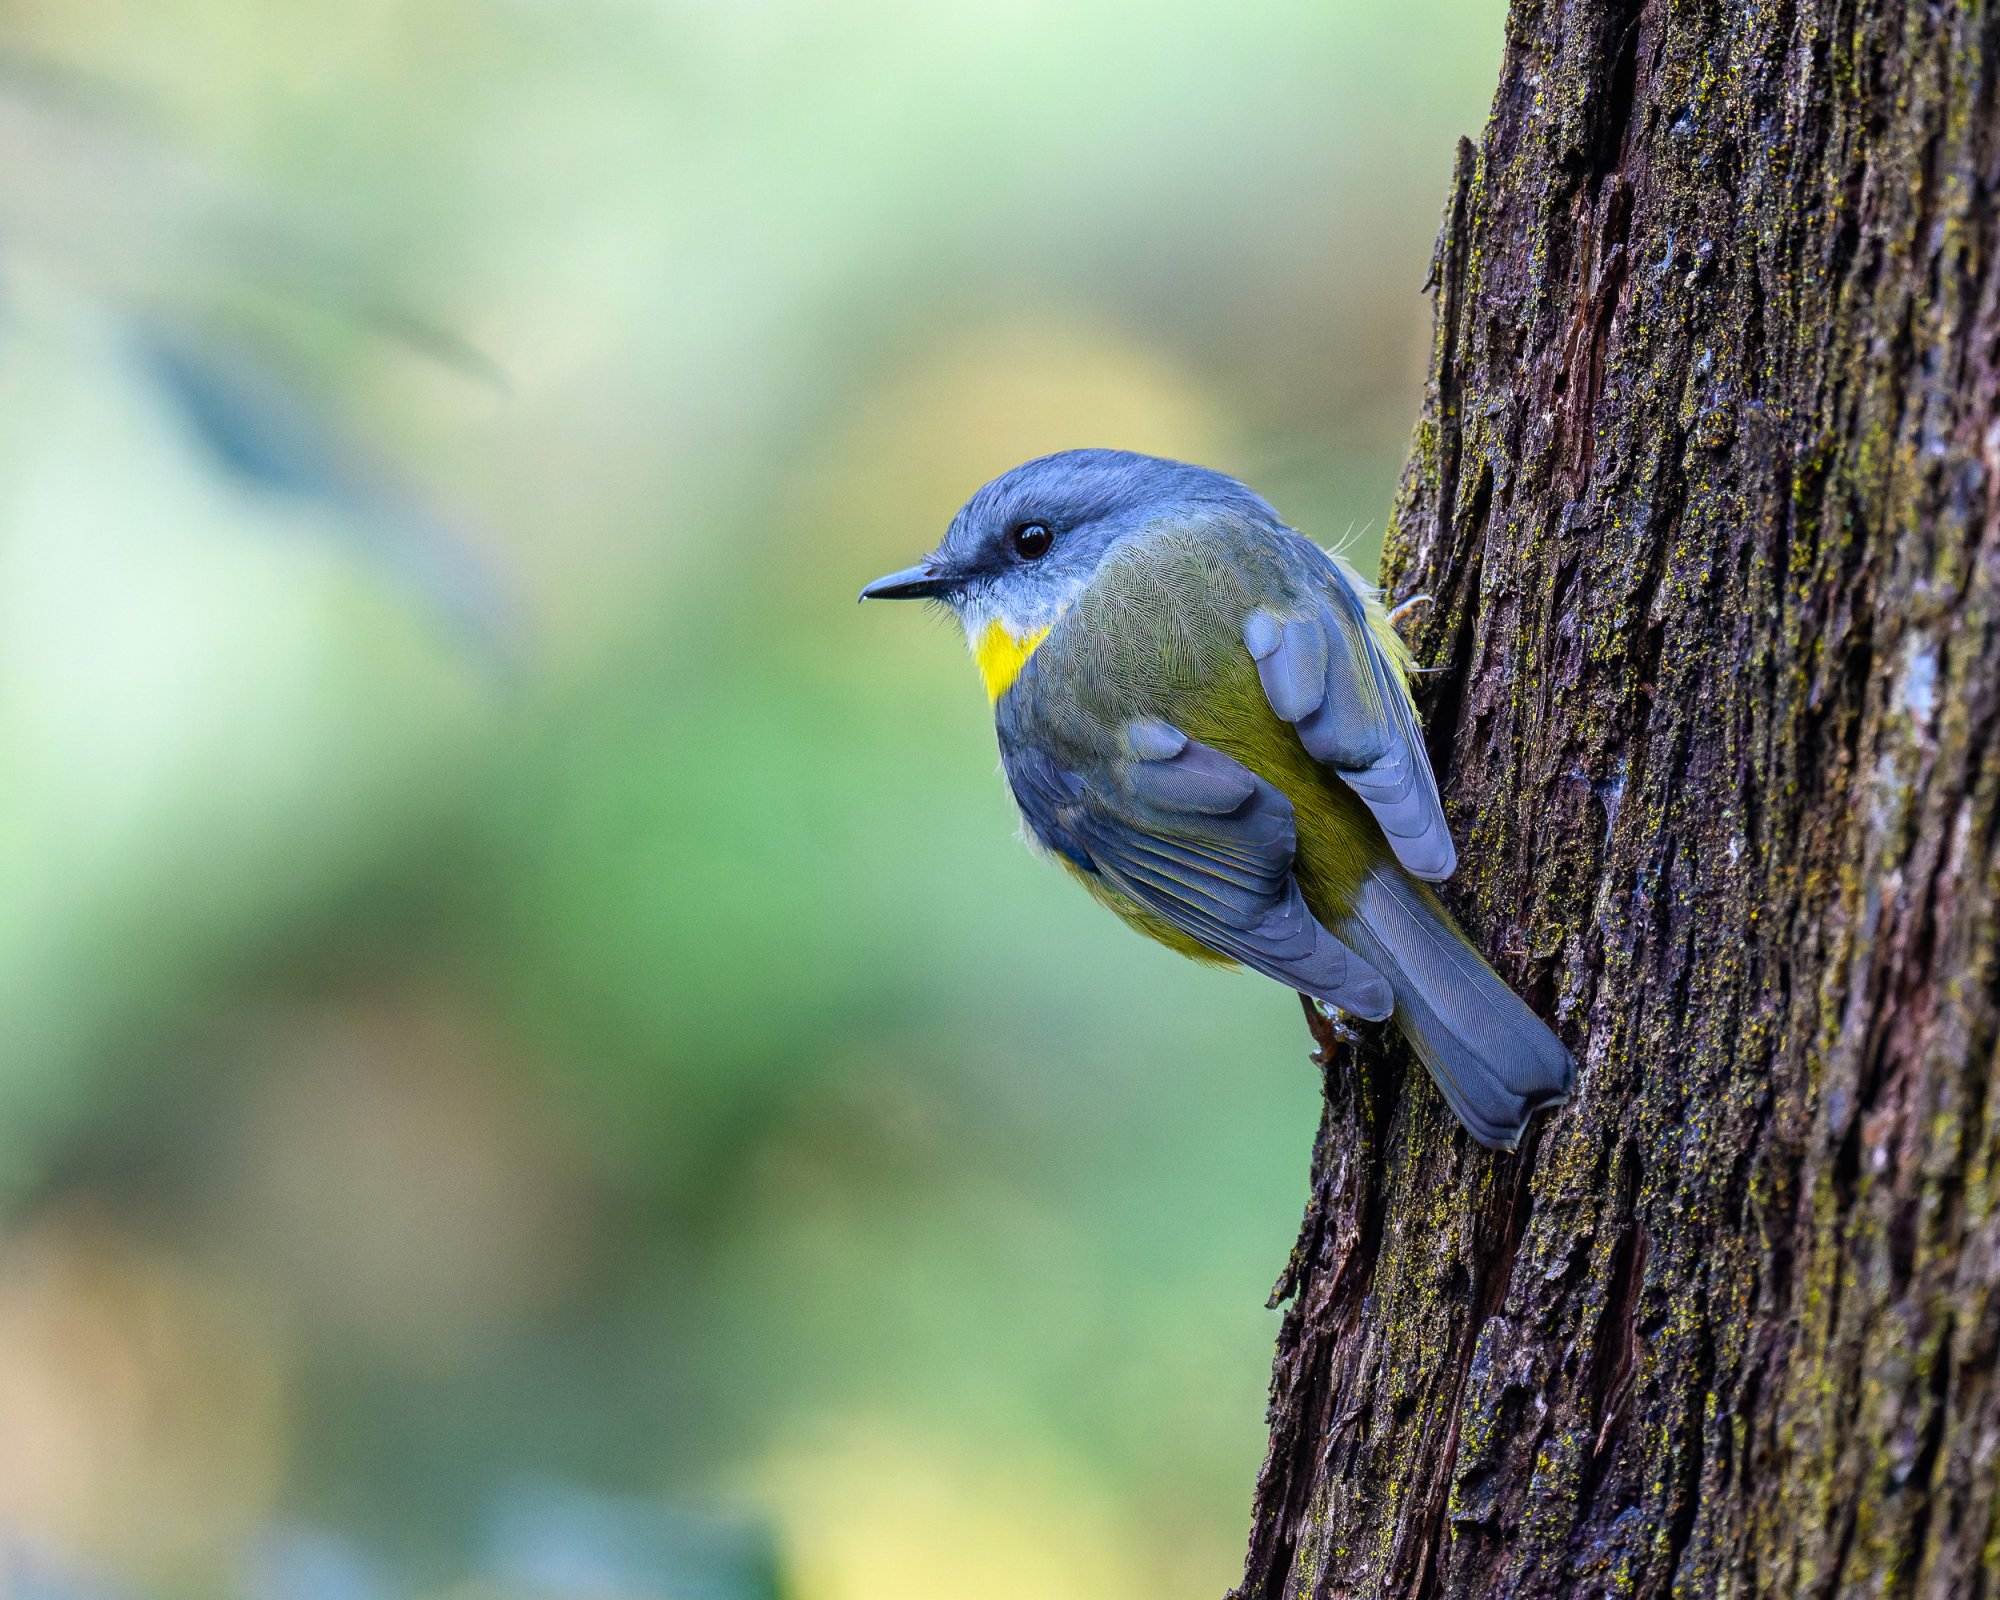
A Yellow Robin processed with PureRAW 3 (first) and PureRAW 4 (second)
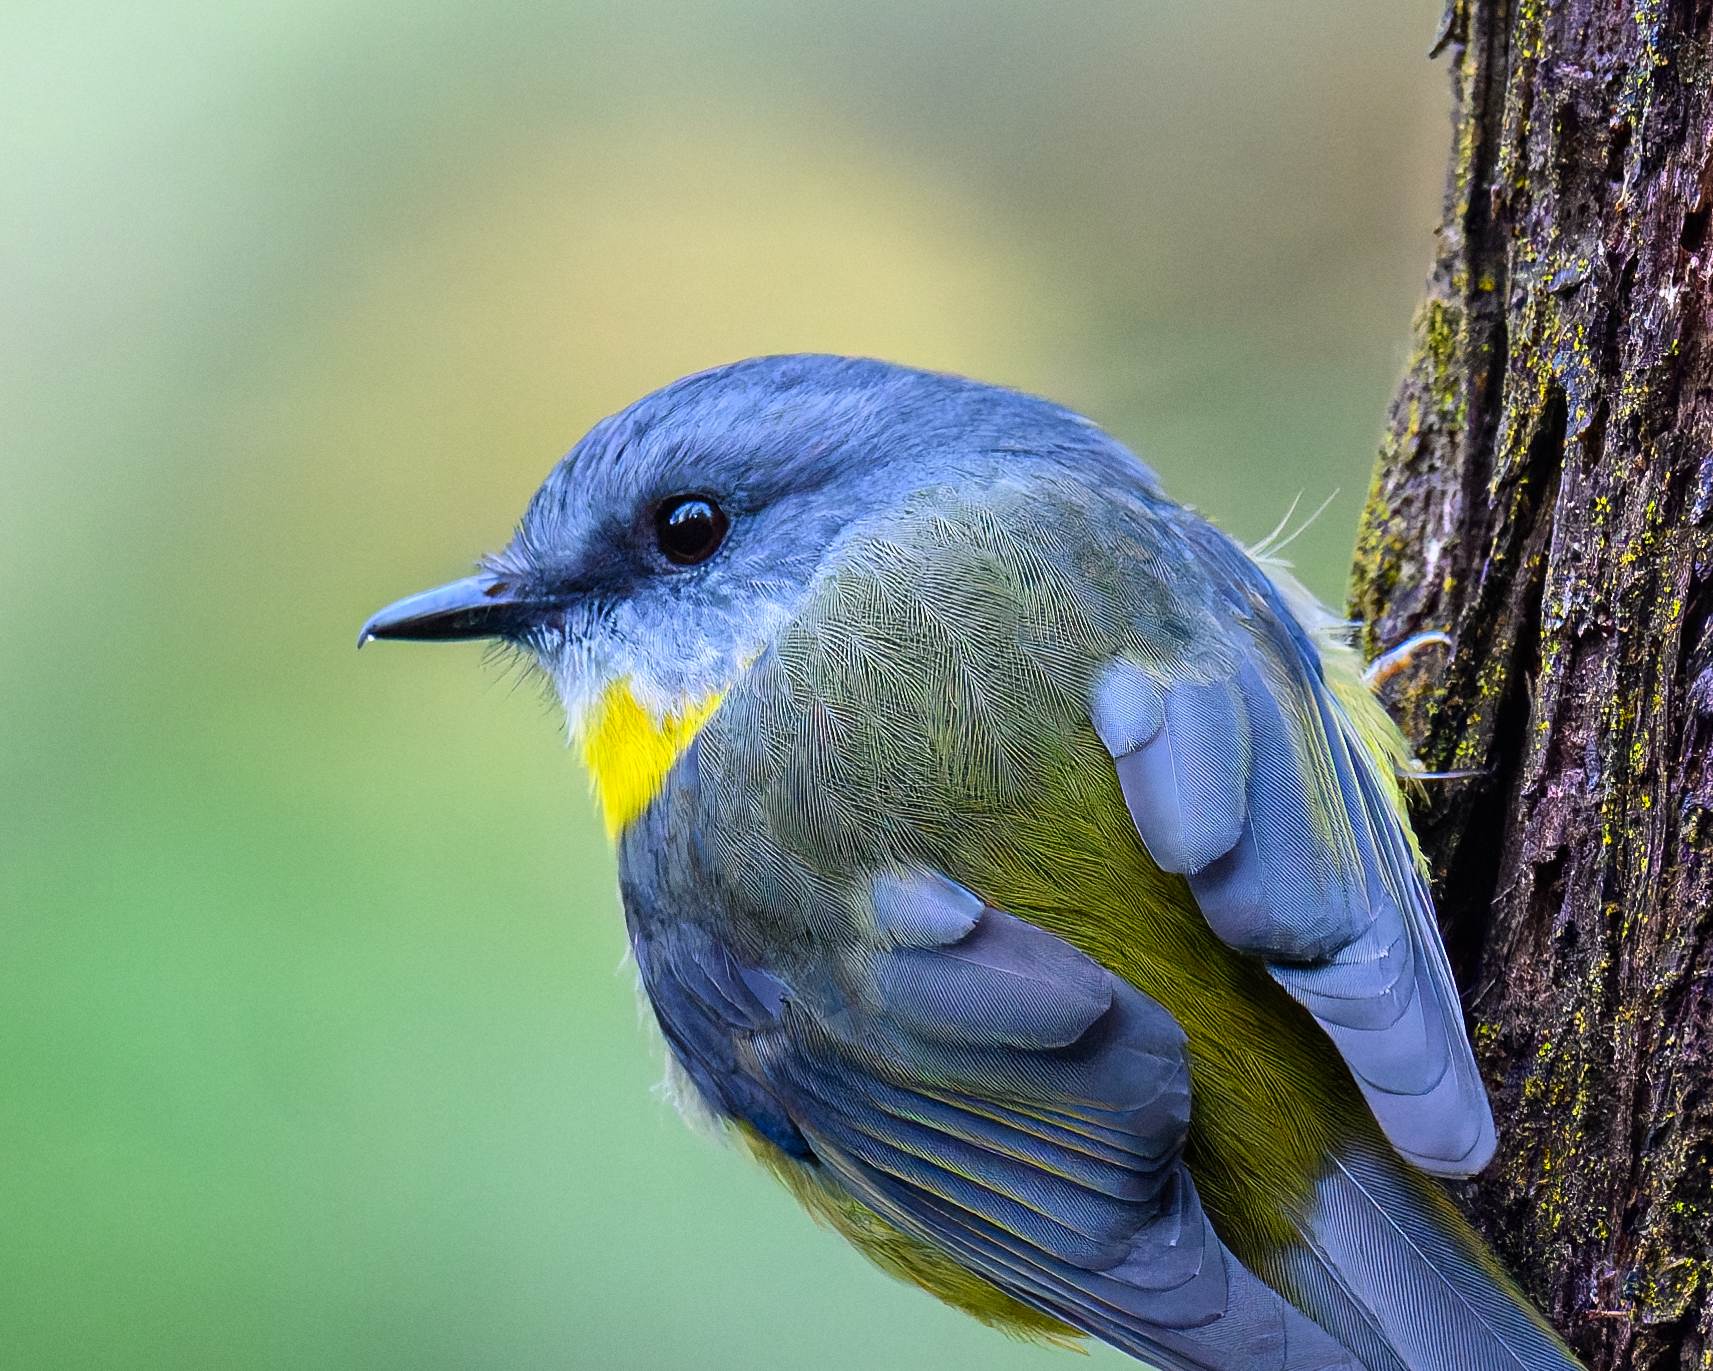

A 100% Crop of the Yellow Robin Image

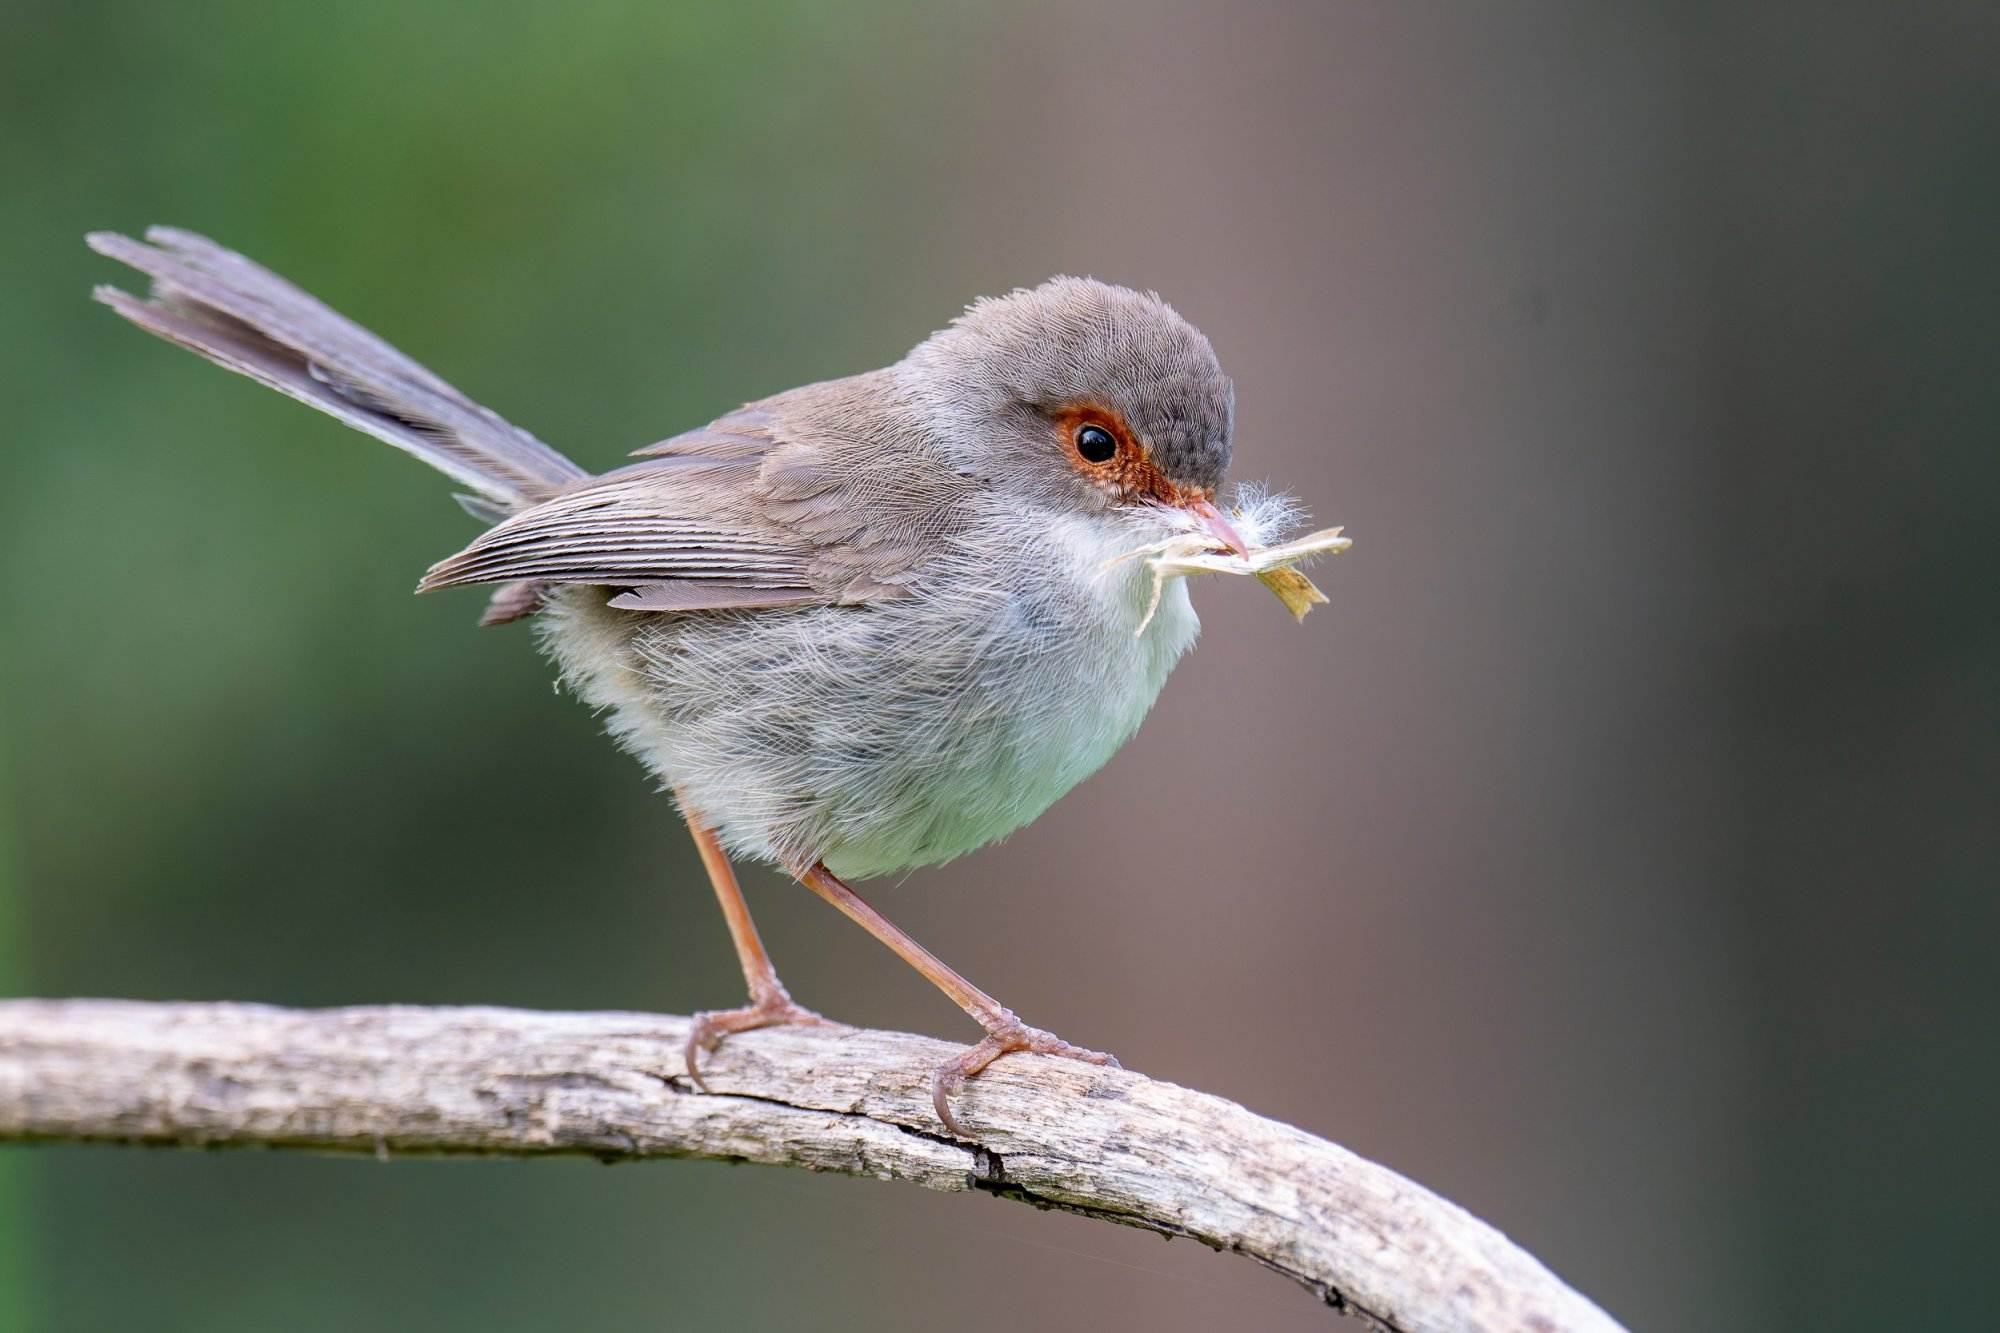
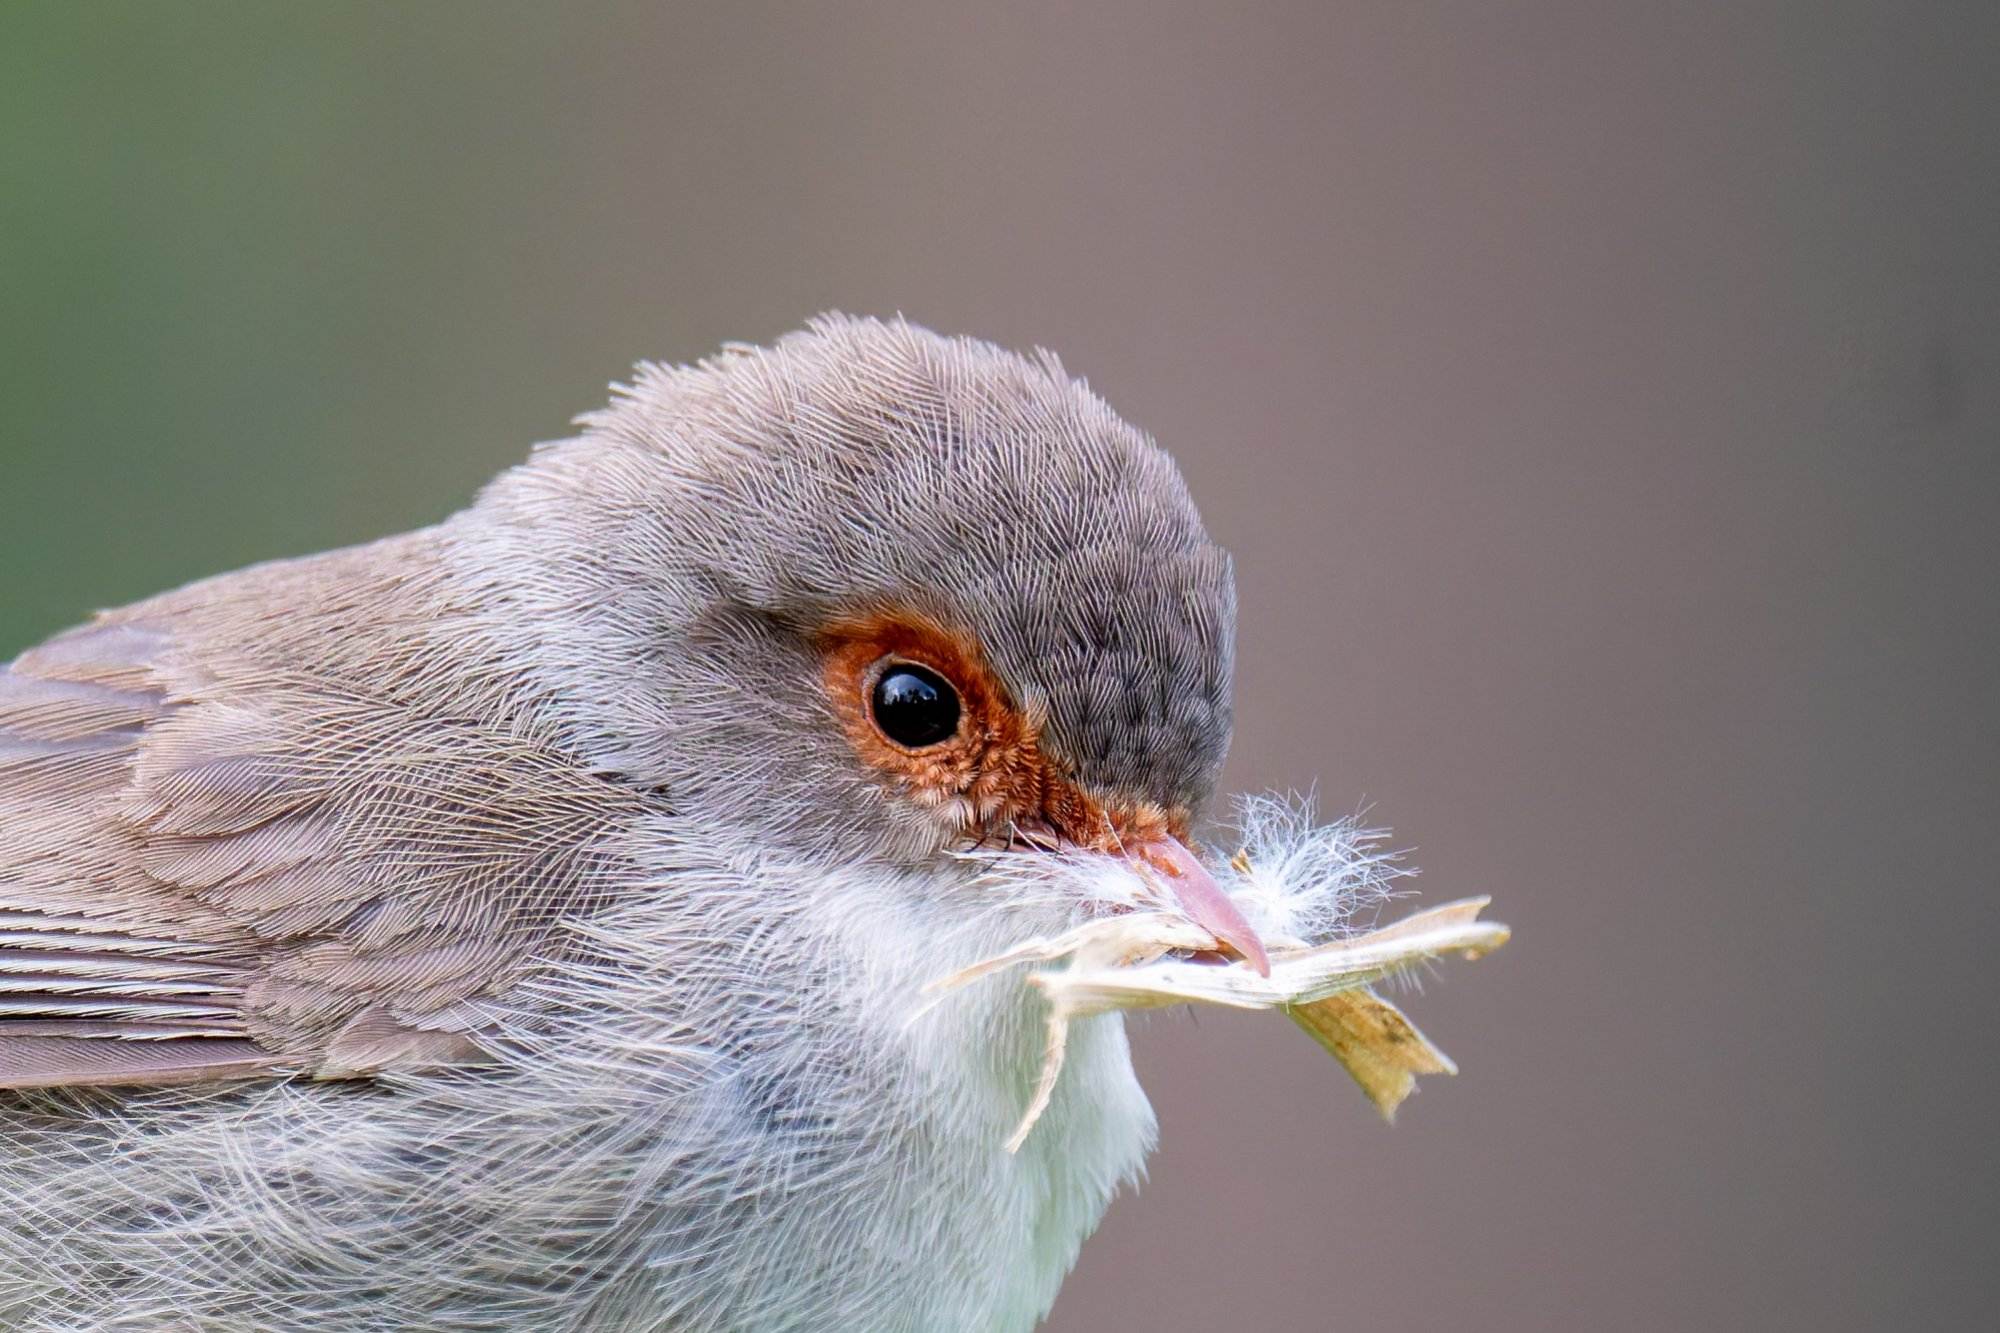
A Wren processed with PureRAW 3 (first) and PureRAW 4 (second)

A Yellow Robin processed with PureRAW 3 (first) and PureRAW 4 (second)
So… conculsions?
- The results are VERY similar between the two
- There are some small colour and contrast differences between the two engines. PureRAW 4 is a little more natural. This can be reversed by adjusting the sliders in Lightroom by a couple of points.
- PureRAW 4 results are slightly sharper than PureRAW 3 out of the box, requiring less sharpening in Lightroom, which is always good.
- Backgrounds are smoother and there are less artefacts in the PureRAW 4 results
Should You Buy or Upgrade to PureRAW 4?
My opinion - Yes, for a couple of reasons:
The speed differences when you’re processing more than one image at a time is significant. Less waiting around for your images to process is always a good thing. A 25% increase on the same hardware is quite impressive.
The new image preview that lets you see how different settings affect your images will allow you to tweak your images to get the most out of them. Along with the advanced sliders - this is a big deal
Image quality improvements are subtle - but they are there. There seems to be less artefacts around things like fur, hair, etc and backgrounds with solid colour are slightly smoother.
How To Buy PureRAW 4
If you’re interested in buying DxO PureRAW 4 you can do so over at their website.
I strongly suggest you download a trial version first to test it out on your machine, with your photos. You can do that here:
Why not try out the PureRAW 4 software on your own images? You can download a 30 day free trial.
Try PureRAW for free